10 March, 2016

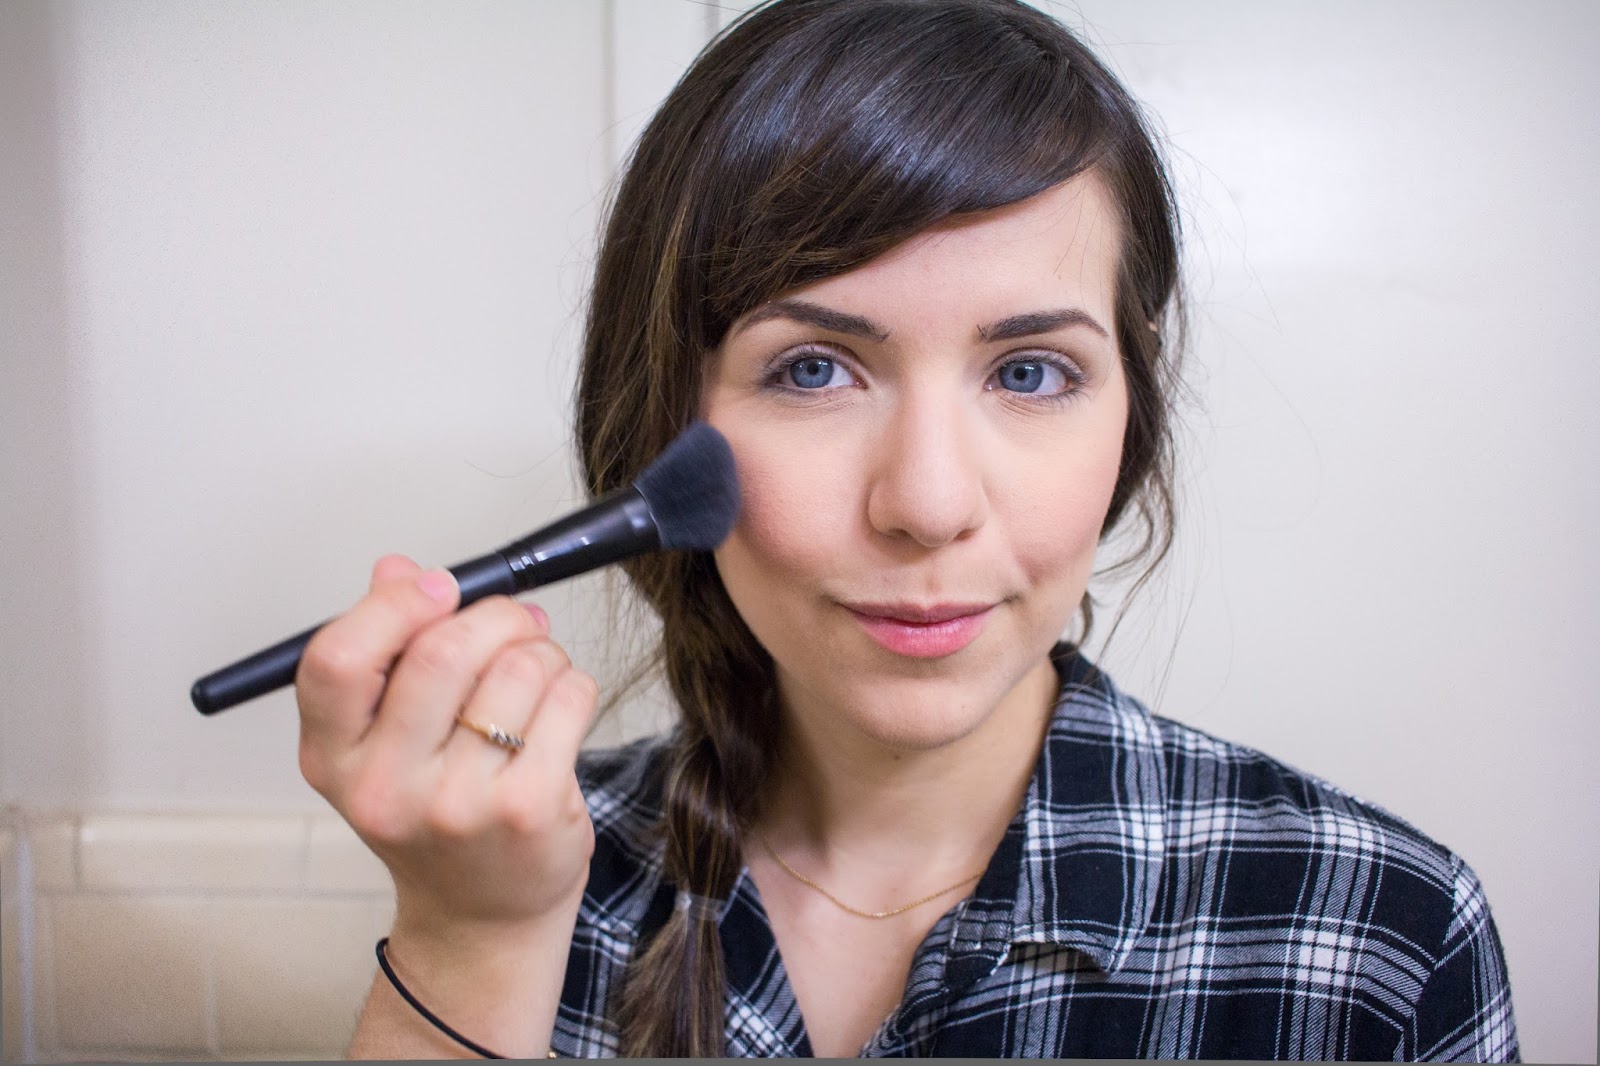
Everyday Makeup Routine


Unless I'm going to work or getting dolled up for a date night, I like to keep my makeup really light and super simple. It's not a "no-makeup makeup" look by any means because I definitely use my fair share of products. I instead like to call it the "you, but better" makeup. Plus, because it is so simple I'm able to do this makeup in 10 minutes, which is perfect because that's about as long as EJ's attention span (on a good day!). If I'm just hanging out at home I usually don't wear makeup and I let my skin take a breather. That being said, I almost never just stay at home because I usually work or have a lengthy list of errands to run. So for those days, this is my go to look! 


Unlike Beyonce, I woke up like this. Yikes! While I don't have any problem quickly running to the store to pick something up looking like this, I just rather look a little more fresh-faced and spare the general public from trying to internally guess if I'm sick (nope) or crazy (nope) or just tired (yep). I like this makeup for when I want to look a little more put together and I'm running around town doing errands or going out to lunch.
In the morning, this is what I'm working with and, aside from the dark circles under my eyes (that I'm pretty sure are just genetic and would be there even if I slept 8 solid hours a night) and the few spots, I'm pretty happy with where my skin is at! I've added a couple new items to my skin care routine and if I'm still as happy with them in a couple weeks as I am now, I will definitely be sharing my routine in an upcoming post.


After cleansing, putting on serum and moisturizing, I start by mixing one part Covergirl Outlast Stay Fabulous foundation in the shade 820 with one part Nivea Post Shave Balm. I would say this Covergirl foundation is medium coverage so I like to sheer it out with the post shave balm, and since I use it as my primer most days, it helps keep me looking fresh-faced all day! I apply and blend this with my fingertips, just as I would any tinted moisturizer.


Next I use Maybeline's Instant Age Rewind Dark Circle Eraser in the shade fair. I apply it under my eyes in an upside down triangle shape and anywhere I want to highlight, such as the tops of my cheeks and the middle of my nose. Then I use a tapping motion to blend it  out with a damp Real Techniques beauty sponge (I wrung it out too hard the first time I washed it and it ripped in half! I'm thinking about splurging on the Beauty Blender next but I'm just using my sad sponge for now). I also conceal any spots I might have going on.


Anytime you use concealer you always want to set it with some sort of powder. I've been using the Elf High Definition Powder in translucent and while I'm not in love with it, I don't hate it either. That being said, I probably will be looking for a better setting powder once I'm done with it (so if you have any suggestions please share!). I found that with this powder that I have to "bake" it (which basically just means leave an excessive amount of it on there for a few minutes) under my eyes to keep my concealer from creasing or melting off my face, and I use the other end of my sad beauty sponge for this.


I once heard a quote that eyebrows are not twins, they're sisters, except for in my case I have the beautiful sister on the right and the ugly sister on the left. So, needless to say, unless I'm wearing my bangs straight across to where they hide them, I have to fill my eyebrows in. To do that, I use a small angled brush and the dark brown shade in a Revlon Colorstay eyeshadow quad that I've had for a while. I then go in and brush through my brows with a spooly brush.


By the time I finish my eyebrows, my setting powder has finished "baking" (such a weird term and I kinda hate using it but it is what it is!) so I use the Elf mineral powder brush (I use basically all Elf brushes.. I should be sponsored by them but I'm not - I just genuinely love them that much!) to sweep away all the excess setting powder.


Next I use my all-time favorite bronzing powder to do a little contour just under my cheekbones. They sell brushes specifically for contouring but I honestly love using the cheesy little brush that came with the compact! I then use Elf's complexion brush to blend it all out and add a little more bronzer to warm my face up.


With Elf's contour brush, I use the same bronzing powder in the crease of my eyelids. It just gives a little definition to the eyes without it feeling like it's too obvious.


Next is my all-time favorite step - blush! Seriously, if I was on a deserted island with only two beauty products it would most definitely be blush and concealer. You probably recognize this blush from my February favorites, its the Ulta mineral blush in the shade sweet pea, aka the perfect pink blush. I use an Elf angled blush brush to apply it to the apples of my cheeks.


Next is highlight! This is another product from my February favorites, the Milani eye shadow in Bella Chiffon. I dip the very tip of the (you guessed it) Elf blush brush to dust this on the top of my cheeks, down the center of my nose and across my entire eyelid, just to give my skin a little glow. 


This step looks and feels the creepiest but it makes all the difference! I take my Rimmel Scandaleyes in the black shade and tightline my eyes. It not only makes me look more awake but it helps define my eyes and makes my lashes look fuller.


If I could choose a third beauty product in my deserted island scenario, it would most definitely be mascara! I have been blessed with long eyelashes but I'm seriously lacking in in the volume department so I like mascaras that plump up  my lashes without any clumps. I didn't like Maybelline's Lash Sensational at first, but like a fine wine it has gotten better as it's "aged". (Now, don't go getting grossed out, by "aged" I mean a few weeks!). I like to focus on the root of my lashes and really wiggle the product in there, and then quickly pass through the rest of the lashes.


Last but certainly not least, my all-time favorite lip balm! Josh and I are the king and queen of chapstick and lip balm. We have one in each car, one on each of our nightstands, one in the bathroom, one in the kitchen.. you get the idea. Anywhere we are there's always a chapstick or a lip balm within arm's reach because we hate having dry, naked lips. I've been obsessed with this Fresh Sugar lip treatment in the clear color for quite a while now. I use it every night after I moisturize and, when I'm not using a lipstick or stain, I reach for this. It just keeps my lips so moisturized and so soft throughout the day, it's worth the splurge!


And that's it, you're all done! Seeing this all written down probably makes it seem like this is a super lengthy makeup routine, but like I said earlier, it takes me about 10 minutes to go from bare-face to fresh-face. All the products I use are pretty light and sheer so even though they let your natural skin show through, it really makes all the difference in making me feel like me, but better, and ready to face the day! What are your everyday, must have beauty products? 


xo Kristina

08 March, 2016

Cinnamon Apple Oat Muffins


I've always loved baking. I love the smells, I love putting love into old recipes or trying out new ones, I love how therapeutic it is and how much people enjoy receiving "just because" baked goods. I love improvising and substituting and making recipes completely my own, and this recipe for cinnamon apple oat muffins (that's a mouthful!) is a product of that.

A couple months ago, Josh had an morning meeting before class and he asked me to make some sort of breakfast-y baked good to take to his meeting. I looked at my pantry (that was looking kinda sad on that particular day) and started looking up recipes with the things I did have. As far as baked goods go, you can never go wrong with apples and cinnamon. Add in some oats and you have yourself a good foundation for something really tasty!

So I found a recipe for oatmeal apple muffins and decided to get to improvising. I must've been way too tired that morning (I woke up before Josh and EJ so I could have a little baking therapy time to myself!) because I didn't even write down what all I substituted from the original recipe! Everyone loved the muffins and I was so bummed because I could not remember how to recreate them! 

Like I said, I love making healthy substitutions in recipes I find. Did you know substituting honey for sugar or applesauce for oil/butter is as simple as a 1:1 ratio? Making healthier substitutions is so much simpler than you think! My go-to substitutions in baking are usually honey for brown sugar, applesauce for butter, almond milk for regular milk, so for this recipe I just started from there. 

These muffins may not be the exact replica of the ones I made that morning (always write down what recipes when  you substitute because you never know when you're baking your new favorite goodies!) but they are so delicious! Best of all, they have no butter or oil and are low in sugar so I not only feel good about eating them as breakfast on the go, I also feel good about feeding it to EJ.


First you want to preheat your oven to 400º, but if you want to make this recipe into apple bread, preheat your oven to 350º. Next, whisk together oats, flour (you can use whole wheat, all purpose, or you could even grind up some oats in a food processor and use that as the "flour" component of this recipe!) baking soda, baking powder, cinnamon and salt in a large bowl. I would usually add in some ground flax seeds as well but I was all out.


In a separate bowl, whisk together applesauce, honey, almond milk and egg. For these muffins I used 1 1/4 cup applesauce, but you can substitute 1/4 cup of that for coconut oil, canola/vegetable oil or even butter. 


Once your dry ingredients and your wet ingredients are all nice and mixed, pour the wet mixture over the dry mixture and whisk until fully combined.

Next, dice up your apple of choice and stir it into the batter. I used a medium sized gala apple because it's just what I had at the time but you can use fuji or even a honey crisp or pink lady for a slightly tangier taste. You can also choose to forgo the apple completely and stir in some craisins or walnuts or whatever you have on hand.


Lightly grease a muffin tin or you could use paper muffin liners and scoop about a tablespoon and a half into each muffin cup. Most people say you should fill them about 3/4 of the way up, but I like to live on the edge and I'm a fan of a nice muffin top so I fill them up pretty much to the top! At this point, you'll want to add the delicious and completely optional crumble to the tops of your muffins. I left that out in this batch because I'm planning on having these be part of EJ's breakfast this week.

Please don't mind or judge how dirty my oven door is! I didn't notice until I was uploading my pictures.. whoops.
Once your oven is set to the right temperature (400º for muffins and 350º for a loaf), place your muffin tin or loaf pan in the middle of the oven and bake for 16-18 minutes (muffins) or about 40 minutes (loaf). Now you'll want to sit back and sip on your morning (or afternoon, or whenever) coffee and enjoy the delicious aroma of apples and cinnamon that will be filling your house. (Or if you're me this morning, you'll want to pray that your little guy's nap goes for at least 20 minutes longer so you can finish baking in peace and quiet and maybe even enjoy a warm muffin to yourself.)


Once they're all nice and brown and your toothpick comes out clean, let them cool off for about 10 minutes. 
And that's it! This recipe is so quick and easy and so simple that you really can substitute and improvise and add-in so much and really make it personalized to your family's taste. Not only are they a healthy alternative to breakfast bars and sugary baked goods that you can enjoy, but, as you can see, little taste buds love them too!


 xo Kristina


Cinnamon Apple Oat Muffins
 
Yield: 12 muffins
Ingredients
  • 1 1/2 cups old fashioned oats
  • 1 1/4 cups flour
  • 1 teaspoon baking powder
  • 1/2 teaspoon baking soda
  • 1 teaspoon ground cinnamon
  • 1/4 teaspoon salt
  • 1 1/4 cup unsweetened applesauce
  • 1/2 cup honey
  • 1/2 cup almond milk
  • 1 teaspoon vanilla
  • 1 large egg
  • 1 medium red apple

  • Optional add-ins:
  • 1 cup raisins or craisins 
  • 1/2 cup walnuts 
  • 1/4 cup flax seeds or chia seeds

Optional topping:
  • 1/4 cup quick-cooking oats
  • 1 tablespoon brown sugar
  • 1/8 teaspoon ground cinnamon
  • 1 tablespoon butter, melted
Directions
  1. Preheat oven to 400º (or 350º for apple bread). Lightly grease a muffin tin with cooking spray, or line with paper muffin liners.
  2. Optional topping: In a small bowl, whisk together 1/4 cup oats, 1 tablespoon brown sugar, and 1/8 teaspoon cinnamon. Add 1 tablespoon melted butter and mix together until well combined; set aside.
  3. In a large bowl, combine the oats, flour, baking powder, baking soda, cinnamon and salt. In another bowl, whisk together the applesauce, almond milk, vanilla and egg. Add to dry ingredients and mix until combined. Stir in diced apple or other optional add-ins.
  4. Divide batter evenly into 12 muffin cups. Use your fingers to sprinkle muffins with optional topping.
  5. Bake for 16 - 18 minutes (or about 40 minutes for apple bread) or until a toothpick inserted into the center comes out clean. Remove from oven and cool for a few minutes in the pans.
  6. Enjoy!

03 March, 2016

Quick + Easy Hair Tutorial


As you know, I'm a mama to a 12-month-old ball of energy and, now that my hair has grown out (finally!) his little baby fingers always find a way to get all tangled in my hair. Now, I love a good old fashioned top-knot, like the kind that sits right on top of your head. For days off, there's really nothing better and even though top-knots are Josh's arch-enemy, they definitely are my bff. However, I was starting to get bored of always putting my hair up either in a ponytail or a top-knot, so I started looking around for inspiration and playing around with different hairstyles I found on Pinterest. Ever since then, this has been my go-to, easy-as-a-pony-tail-but-fancier hairstyle for when I want to keep my hair out of my face. Some days, if I'm on day 3 hair (real life, it happens!) I wear this to work and I still get compliments on it! It literally is so easy, y'all, I'm talking, 5 minutes - 10 minutes max! - and not only does it keep your hair out of your face and out of tiny little hands' reach, it also makes you look effortlessly put together.


I usually start this hairstyle with second day hair that has a little texture in it. It gives the end result a really nice, messy-in-a-good-way look. 


On days I want even more texture I'll do a quick spray of dry shampoo (I use Dove dry shampoo because it smells so good!) on my roots down halfway on my hair and a little tease just at the top of my head.


Next you want to section off the top section of your hair - from about your temples up. I use Blax Hair Elastics in either the brown or the clear for this hair style. I tried them because we used to carry them at my store and one of my coworkers raved about them and I am ruined for any other hair elastic! They don't snag your hair and they are perfect for hairstyles that involve smaller sections or braids.


Then you're going to section off two more sections - from your temples to just above your ears and then the bottom section below your ears.


Remember the whole "topsy tail" trend that was big in middle school? Yeah, me neither... But that's what we're going to do to the three sections. 


So when you get to the second topsy tail, tuck in the first ponytail and repeat this step with the third section and tuck all the hair in the third topsy tail. 


Now pull some face-framing hair out to loosen the hairstyle up and make it look more casual and messy-chic and you're done! I told y'all, it's such an easy go-to hairstyle! 


You can leave it as it is or you can do the most and braid the ends for a different, more put-together look. I usually leave it as is, but it's totally up to you!


Best of all, it's completely out of reach of this little guy's hands so it's mama and baby approved.


xo Kristina

01 March, 2016

February Favorites

Today on the blog I'm sharing a few of my favorites for the month of February! I want to try to do a monthly favorites blog that includes beauty, entertainment and fashion because I love sharing things I love! (Also, can you believe it's already March!? What.) This month I'm featuring a few beauty faves and one fashion fave.

Beauty


I honestly only tried a handful of new beauty products this month so these definitely qualify as "tried and true" favorites from more than just the month of February. I feel like I should also preface this with my skin type; I have combination/oily and extremely sensitive skin that will break out in acne or hives if it doesn't like a product. Like, a feather could literally graze my face and I will get a massive red hive. It's horrible! So needless to say I'm really careful and choosey about what I put on my skin. I realize that everyone's skin reacts different to certain skin care products so I'm not claiming that these will work for everyone exactly the same or that everyone will fall in love with the products as much as I have, they're just what have worked for me! 

So here are all the beauty & skin care items I've been loving this month:


Milani Bella Eyes Gel Powder Eyeshadow in Bella Chiffon
I've actually been using this to highlight my cheekbones and nose as well as an eyeshadow and I've really been loving it! My skin has yellow undertones so pink toned highlights just don't look right on me. This shade is a lovely gold toned ivory and is so shimmery and so pigmented that it's perfect as a highlight on your eyes or cheeks.


Ulta Beauty Mineral Blush in Sweet Pea
I honestly can't remember the last time I bought something from Ulta's beauty line but I decided to give some of their products a shot after my sister gave me a gift card to Ulta for my birthday. As far as blushes go, I usually gravitate more towards peachy, warm, bronzed tones so I was pleasantly surprised when I fell in love with this blush! It's more cool toned, like a dusty, rosy pink. What I really love about it is that, because it is a mineral blush, it's pigmented yet sheer so it's really easy to build the product to get the right amount of blush. 


Okay so this one I just had to try because I kept hearing rumors about how amazing it was as a primer and you know what? It really is as amazing as everyone says it is! As I mentioned at the beginning of this post, I have combination/oily and very sensitive skin. On top of that, my t-zone tends to get pretty oily as the day goes on so I was definitely curious to see how this product would stand up to everything I have going on with my skin. It is the sensitive formula and it has a really nice cooling effect that gently wakes your skin up and feels really nice when doing your makeup in the morning. It does initially have a strong, spicy/manly cologne smell to it that does wear off after you start applying your makeup, but I honestly don't mind it at all because I prefer "manly" smells to flowery/powdery smells. As the day went on, I did get a little oily but I was really impressed with how it kept my makeup on my face even after an 8 hour shift at work. Even more impressive was that Josh could tell the difference! So needless to say, I highly recommend this as a primer. 


Part of my New Years resolution was to take better care of my skin because I turned 25 this year (hello quarter life crisis!) and I realized that now's the time for preventative maintenance on my skin, aka better to keep wrinkles and uneven texture away now than try to get rid of it later, ya know what I mean? We just started carrying a handful of skin care from the Mario Badescu brand in our store and I figured it was perfect timing for me to try it. I have only tried a few items in the range and even though I am so impressed with a number of them, this product has definitely been the MVP of the month. The formula has alpha hydroxy acids in it that gently exfoliate your skin and make even up your skin's texture. According to the bottle it's especially for combination and oily skin so it's very lightweight and doesn't leave me feeling greasy at all, even when I wear it under my makeup. I use as both my daytime and nighttime moisturizer and when I wake up in the morning after slathering a good amount of it on my face, my skin is so soft and so smooth and I can really tell that it was working even through the night. In fact, I find that even my fingertips/hands feel softer and smoother after I apply this moisturizer on my face. Another product I highly recommend!


The Artist Studio in Elderflower Petal Eau de Parfum
I used to only use one perfume, every single day until I ran out and that was my signature scent but I've recently been getting really into perfumes and fragrances. I love getting to choose the scent I wear that day based on where I'm going, my outfit or my mood. This perfume has notes of geranium and sandalwood and, because it is an eau de parfum, a few sprays will definitely last you all day. It's .5 oz, so not only is it great for traveling but it's double what you would get if you bought a rollerball perfume at a beauty store for basically half the price! Also, I'm a sucker for packaging and this packaging is just the cutest.


Fashion

photo credit: un-fancy.com

One of the things I've been obsessed with for the past month has been having a capsule wardrobe! If you've never heard of a capsule wardrobe, it's basically a system to keep your closet clean and keep you feeling good in your clothes. You choose a certain number of items in your closet and those are the only items that you wear that whole season. Not only does it make it so easy for me to get dressed in the morning, but it also saves me all the money I would've spent on retail therapy! It's a beautiful thing when you realize what you have is more than enough. And the best part of all this is that there's no rules that are set in stone, it's completely personalizable so you can choose what works best for you.

If you're curious to learn more about capsule wardrobes, check out this blog called Un-Fancy. She was one of my biggest inspirations in this whole thing and shows her past capsule wardrobes and outfits she built from those capsules. Even if you don't think a capsule wardrobe is for you, I definitely recommend checking out her blog!


That's all for now!
xo Kristina